Slack
Wasp supports Slack Authentication out of the box.
Using Slack Authentication is perfect when you build a control panel for a Slack app.
Let's walk through enabling Slack Authentication, explain some quirks, explore default settings and show how to override them.
Setting up Slack Auth
Enabling Slack Authentication comes down to a series of steps:
- Enabling Slack authentication in the Wasp file.
- Adding the
Userentity. - Creating Slack App.
- Adding the necessary Routes and Pages
- Using Auth UI components in our Pages.
Here's a skeleton of what our main.wasp.ts should look like after we're done:
import { app, page, route } from "@wasp.sh/spec"
import { LoginPage } from "./src/pages/auth" with { type: "ref" }

// Configuring the social authentication
export default app({
  name: "myApp",
  wasp: { version: "^0.24" },
  title: "My App",
  head: ["<link rel='icon' href='/favicon.ico' />"],
  auth: {
    // ...
  },
  spec: [
    // Defining routes and pages
    route("LoginRoute", "/login", page(LoginPage)),
  ],
})
1. Enabling Slack authentication in the Wasp file.
Now let's properly configure the Auth object:
import { app } from "@wasp.sh/spec"

export default app({
  name: "myApp",
  wasp: { version: "^0.24" },
  title: "My App",
  head: ["<link rel='icon' href='/favicon.ico' />"],
  auth: {
    // 1. Specify the User entity  (we'll define it next)
    userEntity: "User",
    methods: {
      // 2. Enable Slack Auth
      slack: {}
    },
    onAuthFailedRedirectTo: "/login"
  },
  // ...
})
2. Add the User Entity
Let's now define the auth.userEntity entity in the schema.prisma file:
// 3. Define the user entity
model User {
  id Int @id @default(autoincrement())
  // Add your own fields below
  // ...
}
3. Creating a Slack App
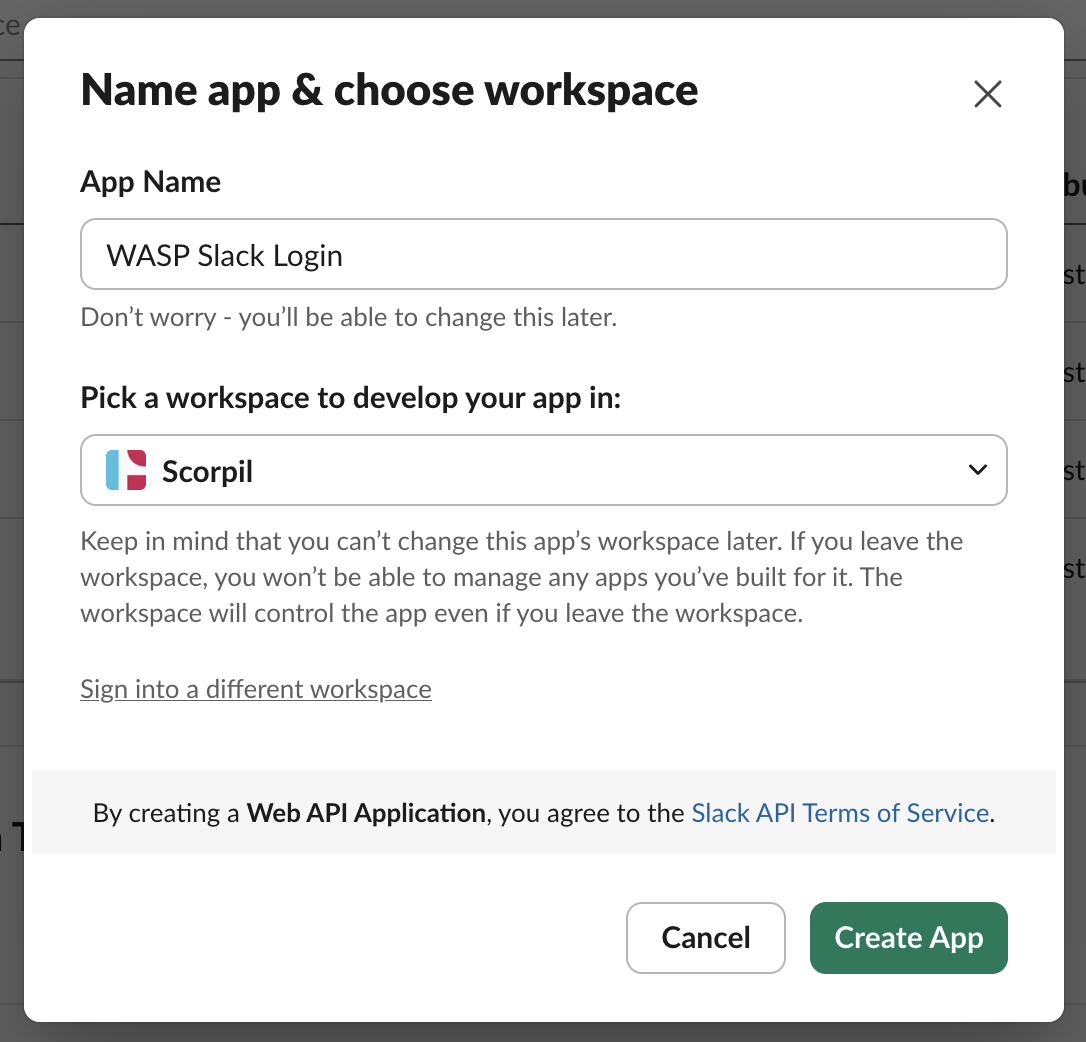
To use Slack as an authentication method, you'll first need to create a Slack App and provide Wasp with your client key and secret. Here's how you do it:
- Log into your Slack account and navigate to: https://api.slack.com/apps.
- Select Create New App.
- Click "From scratch"
- Enter App Name and select workspace that should host your app.
-
Go to the OAuth & Permissions tab on the sidebar and click Add New Redirect URL.
- Enter the value
https://<subdomain>.local.lt/auth/slack/callback, where<subdomain>is your selected localtunnel subdomain. - Slack requires us to use HTTPS even when developing, read below how to set it up.
- Enter the value
-
Hit Save URLs.
-
Go to Basic Information tab
-
Hit Show next to Client Secret
-
Copy your Client ID and Client Secret as you'll need them in the next step.
Be precise with your redirect URL. Slack’s redirect URLs are case-sensitive and sensitive to trailing slashes.
For example, https://your-app.loca.lt/auth/slack/callback and https://your-app.loca.lt/auth/slack/callback/ are not the same.
4. Adding Environment Variables
Add these environment variables to the .env.server file at the root of your project (take their values from the previous step):
SLACK_CLIENT_ID=your-slack-client-id
SLACK_CLIENT_SECRET=your-slack-client-secret
5. Adding the Necessary Routes and Pages
Let's define the necessary authentication Routes and Pages.
Add the following code to your main.wasp.ts file:
import { app, page, route } from "@wasp.sh/spec"
import { LoginPage } from "./src/pages/auth" with { type: "ref" }

export default app({
  // ...
  spec: [
    route("LoginRoute", "/login", page(LoginPage)),
  ],
})
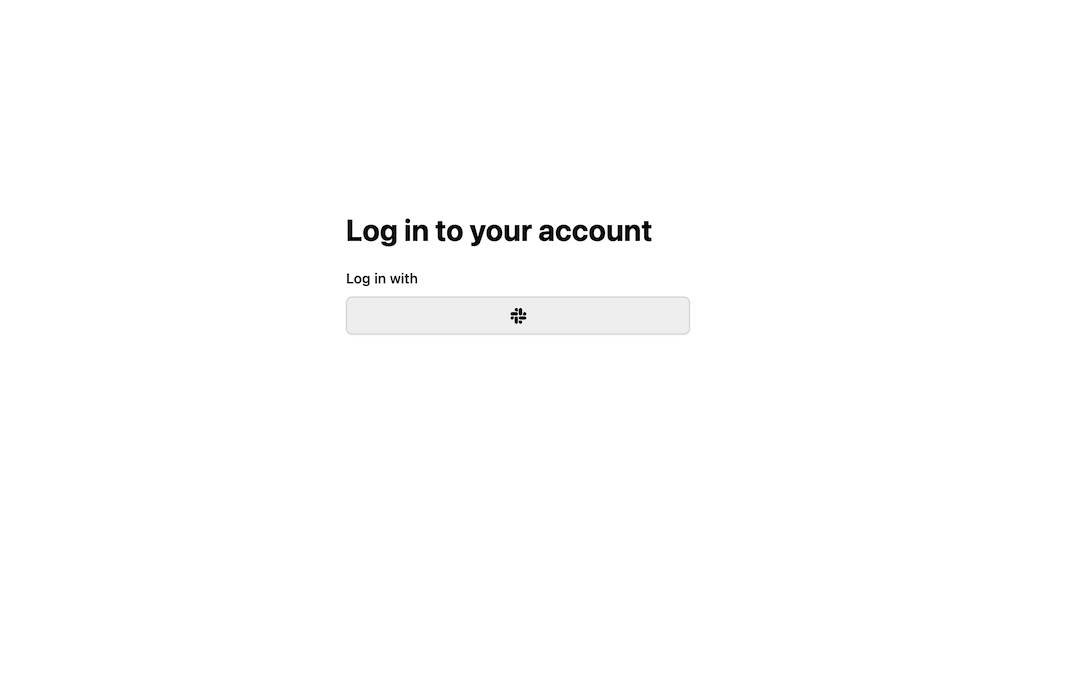
We'll define the React components for these pages in the src/pages/auth.tsx file below.
6. Creating the Client Pages
We are using Tailwind CSS to style the pages. Read more about how to add it here.
Let's create a auth.tsx file in the src/pages folder and add the following to it:
- JavaScript
- TypeScript
import { LoginForm } from "wasp/client/auth";

export function LoginPage() {
  return (
    <Layout>
      <LoginForm />
    </Layout>
  );
}

// A layout component to center the content
export function Layout({ children }) {
  return (
    <div className="h-full w-full bg-white">
      <div className="flex min-h-[75vh] min-w-full items-center justify-center">
        <div className="h-full w-full max-w-sm bg-white p-5">
          <div>{children}</div>
        </div>
      </div>
    </div>
  );
}
import type { ReactNode } from "react";
import { LoginForm } from "wasp/client/auth";

export function LoginPage() {
  return (
    <Layout>
      <LoginForm />
    </Layout>
  );
}

// A layout component to center the content
export function Layout({ children }: { children: ReactNode }) {
  return (
    <div className="h-full w-full bg-white">
      <div className="flex min-h-[75vh] min-w-full items-center justify-center">
        <div className="h-full w-full max-w-sm bg-white p-5">
          <div>{children}</div>
        </div>
      </div>
    </div>
  );
}
We imported the generated Auth UI components and used them in our pages. Read more about the Auth UI components here.
Conclusion
Yay, we've successfully set up Slack Auth! 🎉
Running wasp db migrate-dev and wasp start should now give you a working app with authentication.
To see how to protect specific pages (i.e., hide them from non-authenticated users), read the docs on using auth.
Developing with Slack auth and HTTPS
Unlike most OAuth providers, Slack requires HTTPS and publicly accessible URL for the OAuth redirect URL.
This means that we can't simply use localhost:3001 as a base host for redirect urls. Instead, we need to configure
Wasp server to be publicly available under HTTPS, even in the local development environment.
Fortunately, there are quite a few free and convenient tools available to simplify the process, such as localtunnel.me (free) and ngrok.com (lots of features, but free tier is limited).
Using localtunnel
Install localtunnel globally with npm install -g localtunnel.
Start a tunnel with lt --port 3001 -s <subdomain>, where <subdomain> is a unique subdomain you would like to have.
Usually localtunnel will assign you a random subdomain on each start, but you can specify it with the -s flag.
Doing it this way will make it easier to remember the URL and will also make it easier to set up the redirect URL
in Slack app settings.
After starting the tunnel, you will see your tunnel URL in the terminal. Go to that URL to unlock the tunnel by entering your IP address
in a field that appears on the page the first time you open it in the browser. This is a basic anti-abuse mechanism. If you're not sure
what your IP is, you can find it by running curl ifconfig.me or going to ifconfig.me.
Now that your server is exposed to the public, we need to configure Wasp to use the new public domain. This needs to be done in two places: server and client configuration.
To configure client, add this line to your .env.client file (create it if doesn't exist):
REACT_APP_API_URL=https://<subdomain>.loca.lt
Similarly, to configure the server, add this line to your .env.server:
WASP_SERVER_URL=https://<subdomain>.loca.lt
Default Behaviour
Add slack: {} to the auth.methods object to use it with default settings.
import { app } from "@wasp.sh/spec"

export default app({
  name: "myApp",
  wasp: { version: "^0.24" },
  title: "My App",
  head: ["<link rel='icon' href='/favicon.ico' />"],
  auth: {
    userEntity: "User",
    methods: {
      slack: {}
    },
    onAuthFailedRedirectTo: "/login"
  },
  // ...
})
When a user signs in for the first time, Wasp creates a new user account and links it to the chosen auth provider account for future logins.
Overrides
By default, Wasp doesn't store any information it receives from the social login provider. It only stores the user's ID specific to the provider.
There are two mechanisms used for overriding the default behavior:
userSignupFieldsconfigFn
Let's explore them in more detail.
Data Received From Slack
We are using Slack's API and its /openid.connect.userInfo endpoint to get the user data.
The data we receive from Slack on the /openid.connect.userInfo endpoint looks something like this:
{
    "ok": true,
    "sub": "U0R7JM",
    "https://slack.com/user_id": "U0R7JM",
    "https://slack.com/team_id": "T0R7GR",
    "email": "krane@slack-corp.com",
    "email_verified": true,
    "date_email_verified": 1622128723,
    "name": "krane",
    "picture": "https://secure.gravatar.com/....png",
    "given_name": "Bront",
    "family_name": "Labradoodle",
    "locale": "en-US",
    "https://slack.com/team_name": "kraneflannel",
    "https://slack.com/team_domain": "kraneflannel",
    "https://slack.com/user_image_24": "...",
    "https://slack.com/user_image_32": "...",
    "https://slack.com/user_image_48": "...",
    "https://slack.com/user_image_72": "...",
    "https://slack.com/user_image_192": "...",
    "https://slack.com/user_image_512": "...",
    "https://slack.com/team_image_34": "...",
    "https://slack.com/team_image_44": "...",
    "https://slack.com/team_image_68": "...",
    "https://slack.com/team_image_88": "...",
    "https://slack.com/team_image_102": "...",
    "https://slack.com/team_image_132": "...",
    "https://slack.com/team_image_230": "...",
    "https://slack.com/team_image_default": true
}
The fields you receive depend on the scopes you request. In the example above, the scope includes email, profile and openid. By default, only openid is requested. See below for instructions on how to request additional scopes.
For an up to date info about the data received from Slack, please refer to the Slack API documentation.
Using the Data Received From Slack
When a user logs in using a social login provider, the backend receives some data about the user.
Wasp lets you access this data inside the userSignupFields getters.
For example, the User entity can include a displayName field which you can set based on the details received from the provider.
Wasp also lets you customize the configuration of the providers' settings using the configFn function.
Let's use this example to show both fields in action:
import { app } from "@wasp.sh/spec"
import { config, userSignupFields } from "./src/auth/slack" with { type: "ref" }

export default app({
  name: "myApp",
  wasp: { version: "^0.24" },
  title: "My App",
  head: ["<link rel='icon' href='/favicon.ico' />"],
  auth: {
    userEntity: "User",
    methods: {
      slack: {
        configFn: config,
        userSignupFields
      }
    },
    onAuthFailedRedirectTo: "/login"
  },
  // ...
})
model User {
  id          Int    @id @default(autoincrement())
  username    String @unique
  avatarUrl   String
}

// ...
- JavaScript
- TypeScript
import { defineUserSignupFields } from "wasp/server/auth";

export function config() {
  console.log("Inside user-supplied Slack config");
  return {
    scopes: ["openid", "email", "profile"],
  };
}

export const userSignupFields = defineUserSignupFields({
  username: (data) => data.profile.name,
  avatarUrl: (data) => data.profile.picture,
});
import { defineUserSignupFields } from "wasp/server/auth";

export function config() {
  console.log("Inside user-supplied Slack config");
  return {
    scopes: ["openid", "email", "profile"],
  };
}

export const userSignupFields = defineUserSignupFields({
  username: (data: any) => data.profile.name,
  avatarUrl: (data: any) => data.profile.picture,
});
Wasp automatically generates the defineUserSignupFields function to help you correctly type your userSignupFields object.
Using Auth
To read more about how to set up the logout button and get access to the logged-in user in both client and server code, read the docs on using auth.
When you receive the user object on the client or the server, you'll be able to access the user's Slack ID like this:
const slackIdentity = user.identities.slack

// Discord User ID for example "80351110224678912"
slackIdentity.id
Read more about accessing the user data in the Accessing User Data section of the docs.
API Reference
SocialAuthConfig »
All the options for the slack auth method.
For the provider-specific behavior of the configFn and userSignupFields functions, check the Overrides section. For behavior common to all providers, check the Social Auth Overview.