3. Pages & Routes
In the default main.wasp.ts file created by wasp new, there is a page and a route spec:
- JavaScript
- TypeScript
import { app, page, route } from "@wasp.sh/spec"
import { MainPage } from "./src/MainPage" with { type: "ref" }

export default app({
  // ...
  spec: [
    // We specify that the React implementation of the page is exported from
    // `src/MainPage.jsx`. Reference imports must point to files inside `src`.
    route("RootRoute", "/", page(MainPage)),
  ],
})
import { app, page, route } from "@wasp.sh/spec"
import { MainPage } from "./src/MainPage" with { type: "ref" }

export default app({
  // ...
  spec: [
    // We specify that the React implementation of the page is exported from
    // `src/MainPage.tsx`. Reference imports must point to files inside `src`.
    route("RootRoute", "/", page(MainPage)),
  ],
})
Together, these specifications tell Wasp that when a user navigates to /, it should render the MainPage component from src/MainPage.tsx.
The MainPage Component
Let's take a look at the React component referenced by the page spec:
- JavaScript
- TypeScript
import Logo from "./assets/logo.svg";
import "./Main.css";

export function MainPage() {
  // ...
}
import Logo from "./assets/logo.svg";
import "./Main.css";

export function MainPage() {
  // ...
}
This is a regular functional React component. It also imports some CSS and a logo from the assets folder.
That is all the code you need! Wasp takes care of everything else necessary to define, build, and run the web app.
wasp start automatically picks up the changes you make, regenerates the code, and restarts the app. So keep it running in the background.
It also improves your experience by tracking the working directory and ensuring the generated code/types are up to date with your changes.
Adding a Second Page
To add more pages, you can add another route to your spec. You can even add parameters to the URL path, using dynamic segments. Let's test this out by adding a new page:
import { app, page, route } from "@wasp.sh/spec"
import { HelloPage } from "./src/HelloPage" with { type: "ref" }

export default app({
  // ...
  spec: [
    route("HelloRoute", "/hello/:name", page(HelloPage)),
  ],
})
When a user visits /hello/their-name, Wasp renders the component exported from src/HelloPage.tsx and you can use the useParams hook from react-router to access the name parameter:
- JavaScript
- TypeScript
import { useParams } from "react-router";

export const HelloPage = () => {
  const { name } = useParams();
  return <div>Here's {name}!</div>;
};
import { useParams } from "react-router";

export const HelloPage = () => {
  const { name } = useParams<"name">();
  return <div>Here's {name}!</div>;
};
Now you can visit /hello/johnny and see "Here's johnny!"
Cleaning Up
Now that you've seen how Wasp deals with Routes and Pages, it's finally time to build the Todo app.
Start by cleaning up the starter project and removing unnecessary code and files.
First, remove most of the code from the MainPage component:
- JavaScript
- TypeScript
export const MainPage = () => {
  return <div>Hello world!</div>;
};
export const MainPage = () => {
  return <div>Hello world!</div>;
};
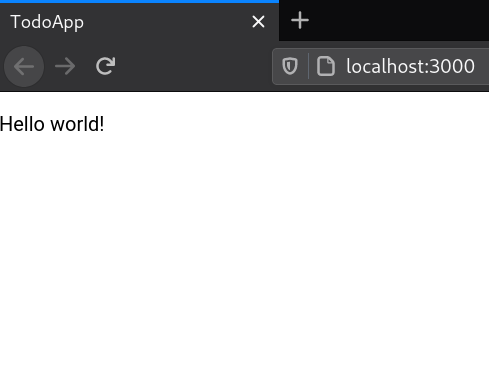
At this point, the main page should look like this:
You can now delete redundant files: src/Main.css, src/assets/logo.svg, and src/HelloPage.tsx (we won't need this page for the rest of the tutorial).
Since src/HelloPage.tsx no longer exists, remove its route from the main.wasp.ts file.
Your Wasp file should now look like this:
import { app, page, route } from "@wasp.sh/spec"
import { MainPage } from "./src/MainPage" with { type: "ref" }

export default app({
  name: "TodoApp",
  wasp: {
    version: "^0.24",
  },
  title: "TodoApp",
  head: [
    "<link rel='icon' href='/favicon.ico' />",
  ],
  spec: [
    route("RootRoute", "/", page(MainPage)),
  ],
})
Excellent work!
You now have a basic understanding of Wasp and are ready to start building your TodoApp. We'll implement the app's core features in the following sections.